Want your roof to last longer and save money on repairs? Proper spring roof maintenance can extend your roof’s lifespan by up to 8 years and save 11¢ per square foot annually. Here’s a quick summary of the 10 essential tasks to tackle this season:
- Inspect for Winter Damage: Check for cracked shingles, rusted flashing, and signs of moisture or ice damage.
- Clean Gutters and Drains: Remove debris, test water flow, and fix any leaks or blockages.
- Find and Fix Leaks: Look for water stains, mold, or damp insulation in your attic and ceilings.
- Trim Overhanging Branches: Keep branches 6–10 feet away from your roof to prevent damage.
- Test Ventilation: Ensure attic vents are clear to avoid moisture buildup and overheating.
- Inspect Roof Sealants: Check for cracks or peeling around chimneys, vents, and skylights.
- Check Metal Components: Look for rust, loose fasteners, and damaged coatings on metal roof parts.
- Remove Moss: Use soft washing or prevention strips to stop moss from damaging shingles.
- Fix Sagging Areas: Address dips in your roofline to prevent costly structural repairs.
- Hire a Professional: For complex issues or a thorough inspection, call a roofing expert.
Quick Tip: Start with a visual inspection on a clear day, and prioritize tasks based on visible damage. Regular upkeep now can save you thousands in repair costs later!
Roof Maintenance Checklist for Spring
1. Look for Winter Damage
Even in Los Angeles, winter weather can take a toll on your roof. Catching issues early can save you from costly repairs. Start by checking specific roof components and looking for signs of ice or moisture damage.
Examine Shingles and Flashing
Take a close look at essential roof elements. Pay attention to these:
- Damaged shingles: Look for cracks, bends, or missing pieces.
- Dark patches: These could signal problems with the flashing.
- Rust spots: Check metal flashing around chimneys and vents.
- Loose materials: Inspect areas where flashing meets walls or roof fixtures.
"Roof flashing may be thin and flat, but it plays a mighty role in keeping water from damaging your home." – Warner Roofing, Inc.
Use binoculars for a ground-level inspection, or wear proper safety gear if you need to climb up. Safety first!
Find Ice and Snow Effects
Winter weather often leaves behind clues. Here’s what to watch for:
| Weather Effect | Potential Damage | Weight Impact |
|---|---|---|
| Packed Snow | Structural stress | Up to 30 lbs per cubic foot |
| Ice Formation | Expands cracks | 1 inch = 1 foot of fresh snow |
| Moisture Buildup | Internal leaks | Can lead to mold growth |
Look out for these warning signs:
- Water stains on ceilings or walls inside your home.
- Sagging areas that may indicate structural strain.
- Mold or mildew, which could mean moisture is seeping in.
- Damaged gutters caused by winter stress.
Plan your inspection for a clear, dry day. If you notice multiple problems, it’s a good idea to call a professional roofer.
2. Clear Gutters and Drains
Taking care of your gutters in spring is essential to avoid water damage to your home. Well-maintained gutters help protect against foundation problems, roof issues, and costly interior repairs.
Clean Out Debris
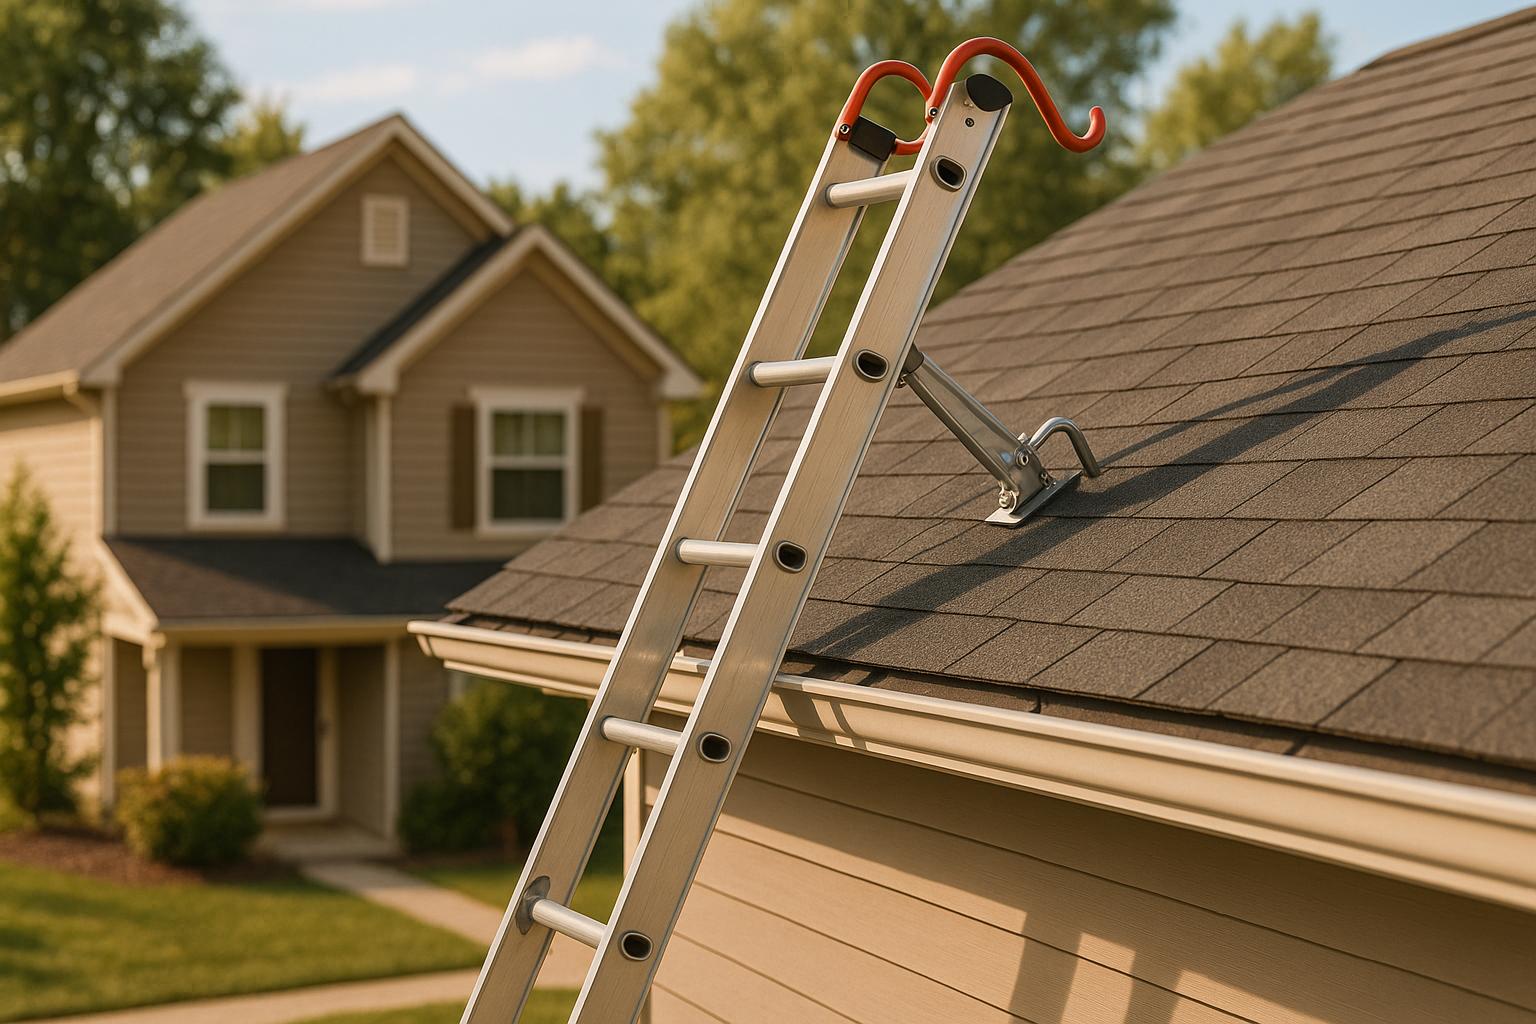
Start by ensuring safety: set up a sturdy ladder on stable ground, wear gloves and protective eyewear, and secure the ladder properly. Use a plastic scoop to remove leaves, twigs, and other debris, focusing on the area around the downspout.
| Potential Damage | Average Repair Cost |
|---|---|
| Foundation Cracks | $2,000 – $10,000+ |
| Water Damage Restoration | $2,000 – $5,000 |
| Basement Flooding | $3,000 – $10,000 |
| Fascia Damage | $600 – $6,000 |
Key areas to focus on while cleaning:
- Downspout openings: Clear blockages with a plumber’s snake.
- Gutter corners: These spots often collect the most debris.
- Seams and joints: Look for any gaps or separations.
- Fasteners: Ensure they’re secure and free from rust.
Once the gutters are clear, it’s time to check if they’re working efficiently.
Test Water Flow
Good drainage is critical, and testing water flow is the next step.
"The only way to fully test guttering for correct water flow is to flush the gutters with water"
Here’s how to test your gutters:
- Flush Test: Run water through the gutters using a garden hose. Watch for smooth flow toward the downspouts and check for leaks or slow drainage.
- Downspout Check: Place the hose directly into the downspout to ensure water exits at ground level. If flow is weak or nonexistent, there may be a blockage.
- Slope Inspection: Water should flow naturally toward the downspouts. Standing water could mean the gutters need professional adjustment to fix their slope.
Properly cleaned and tested gutters can save you from costly repairs down the line.
3. Find and Fix Leaks
Catching leaks early can save you from expensive repairs and structural headaches down the line.
Check Your Attic
Your attic is a great place to start when hunting for leaks. Keep an eye out for these signs:
- Dark spots or stains: Discolored areas on wooden beams or insulation could indicate water damage.
- Mold growth: Moisture in corners and joints often leads to mold.
- Damp insulation: Insulation that feels wet or soggy is a red flag.
- Light shining through: Look for spots where daylight peeks through your roof, often called "shiners".
Once you’ve checked the attic, move on to your home’s interior for more clues.
Look at Indoor Surfaces
Sometimes, the inside of your home tells the story of a roof leak.
"Do not ignore roof leaks; timely professional repairs reduce further damage." – IKO
Take photos of any damage you find and place buckets under active leaks. Focus on common trouble spots, such as:
- Ceiling corners and joints
- Areas around light fixtures
- Where walls meet the ceiling
- Water stains or other signs of moisture
Keep in mind that water often travels from its entry point before becoming visible. This means you’ll need to determine whether the issue is a roof leak, condensation, or even a plumbing problem.
For quick, temporary fixes:
- Move valuable items out of harm’s way.
- Use roofing tape or sealant to patch small holes.
- Securely fasten tarps over larger damaged areas.
These steps are stopgaps until you can arrange for permanent repairs.
4. Cut Back Tree Branches
Tree branches can pose a threat to your roof during spring. They might scrape against shingles, drop leaves that hold moisture, or even fall onto the roof during strong storms.
To protect your roof, keep branches at least 6–10 feet away. For larger trees, aim for a distance of 20–30 feet. Interestingly, mature trees positioned upwind can also act as a shield against strong winds, offering some protection for your shingles.
It’s best to hire a certified arborist for this job. They have insurance, proper tools, and the expertise to handle the task safely. If the branches belong to a neighbor’s tree, check local regulations first, talk to your neighbor, document the overhanging branches, and still rely on a certified arborist.
If pruning would require removing over 25% of the tree’s branches, consult an arborist to determine if full tree removal is a better option. Once the overhanging branches are taken care of, you can focus on inspecting other parts of your roof.
5. Test Roof Air Flow
Proper ventilation is key to avoiding moisture buildup and keeping your roof in good condition. Without it, attic temperatures can soar to 150°F, leading to potential damage.
Clear All Vents
Start by removing any loose debris like leaves, branches, or pine cones from soffit and ridge vents. This ensures air can flow freely. Pay attention to these areas:
- Soffit vents: Check for blockages caused by insulation or debris.
- Ridge vents: Make sure they’re unobstructed and sealed correctly.
- Attic fans: Confirm they’re functioning and free from obstructions.
Check for Trapped Moisture
Poor ventilation often leaves visible clues. Be on the lookout for:
| Warning Sign | What to Look For | Why It Matters |
|---|---|---|
| Attic Issues | Beaded water on plywood, rusted nails, water stains | Points to immediate ventilation problems |
| Indoor Signs | Water stains on ceilings, peeling paint, warped wood | Indicates moisture is seeping into living areas |
| Shingle Damage | Cracking or curling shingles | Suggests extreme temperature changes |
For hidden moisture, use a moisture meter on wood, drywall, or carpet near the roof. This can help detect water issues before they become visible.
"Poor attic ventilation negatively impacts your home and can ultimately cost you money", says Annie Crawford.
"Mold in the home can cause ‘sore throats, stuffy noses, coughing or wheezing, burning eyes, or skin rash’".
If you notice these warning signs, reach out to a roofing professional right away. Ensuring good airflow not only protects your roof but also safeguards your home and health.
Once you’ve confirmed proper ventilation and addressed any moisture concerns, move on to inspecting roof sealants in the next section.
sbb-itb-d1d6490
6. Check All Sealants
Inspecting your roof’s sealants is crucial for avoiding water damage, blocking UV rays, and keeping energy costs in check.
Pay special attention to sealants around:
- Chimneys and vents
- Skylights
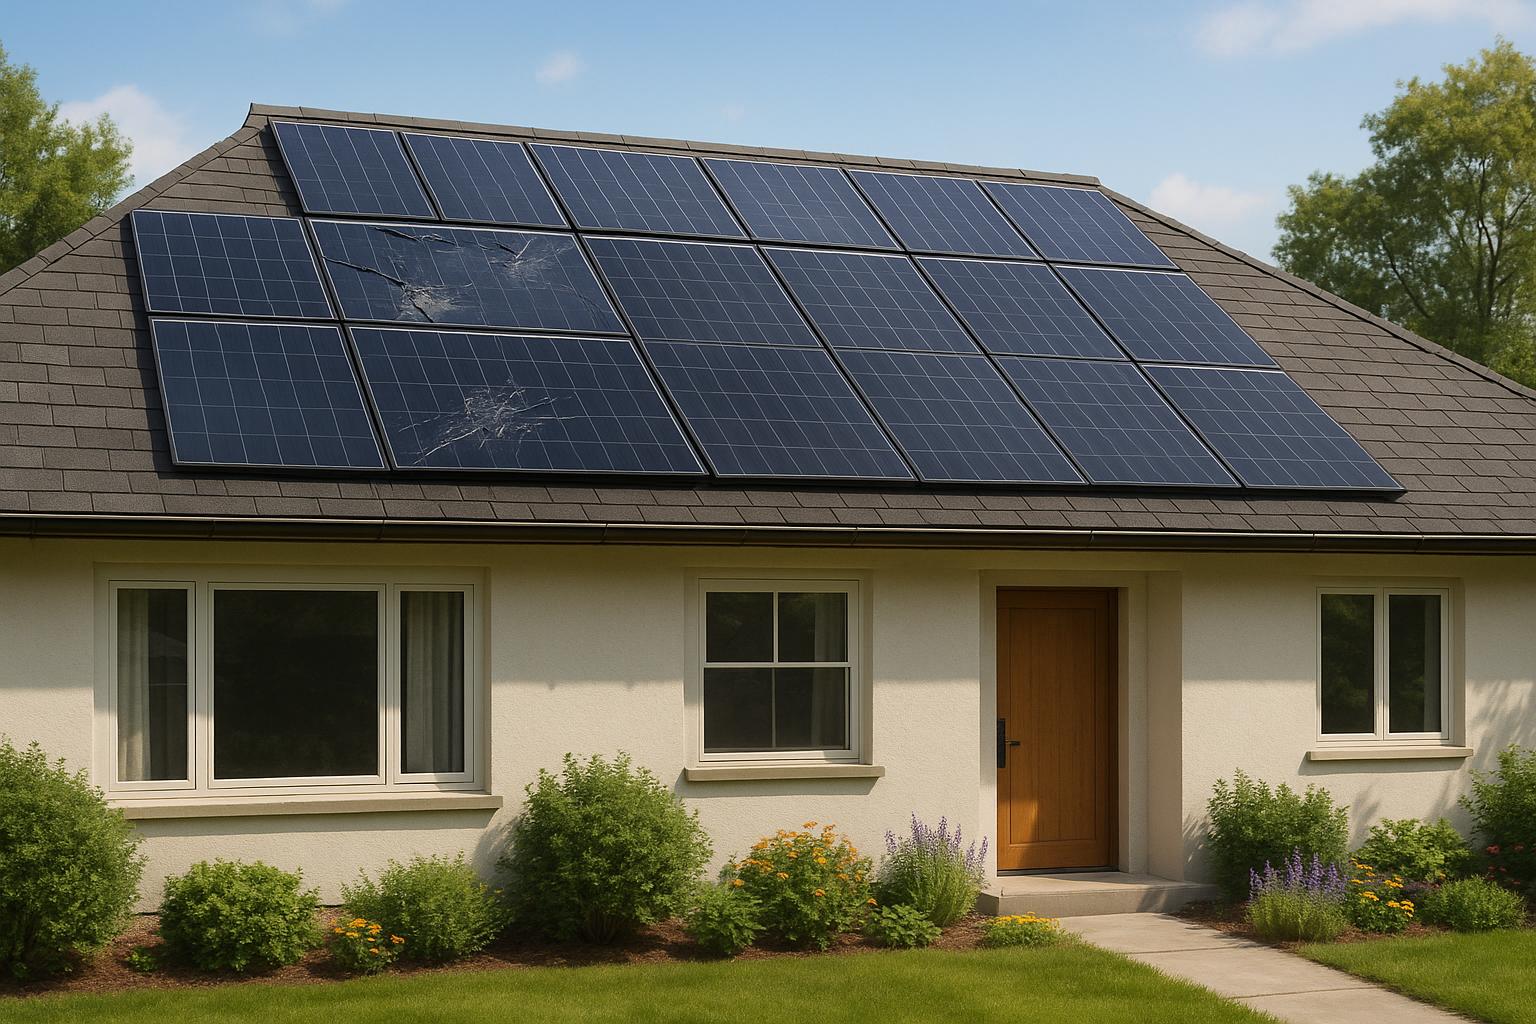
- Solar mounts
- Satellite dishes
- Any other roof penetrations
Watch for signs of wear like cracks, discoloration, peeling, or brittleness. If you spot these issues, it’s time to replace the sealant.
Choosing the Right Sealant
Different sealants work better for specific conditions. Here’s a quick comparison:
| Sealant Type | Best Use Case | Durability Factors |
|---|---|---|
| Silicone | High-sun areas | UV and water-resistant |
| Polyurethane | Rainy regions | Strong water resistance, moderate UV |
| Acrylic | Sloped roofs | Great UV resistance, moderate moisture protection |
For versatile applications, Dicor Self-Leveling Lap Sealant works on multiple materials but takes longer to dry. If you’re sealing larger areas, Liquid Rubber Waterproof Sealant provides excellent coverage with its flexible, long-lasting formula.
Application Tips
To get the best results, follow these steps:
- Clean and dry the surface thoroughly.
- Apply during dry weather with no storms in the forecast.
- Stick to the manufacturer’s temperature guidelines.
- Ensure proper adhesion by pressing the sealant firmly into place.
Sealant packs typically cost between $20 and $50, while materials for sealing an entire roof can range from $150 to $200.
Skipping sealant maintenance can lead to serious problems like structural damage, higher energy bills, and even mold growth. If your roof is over 10 years old, it’s a good idea to have it professionally inspected to ensure everything is sealed properly.
Once you’ve addressed sealant issues, move on to checking for any metal damage.
7. Look for Metal Damage
Winter weather can take a toll on metal roof components, so it’s important to inspect them thoroughly.
Key Areas to Check
Pay close attention to these parts of your metal roof:
- Flashing around chimneys and vents
- Seams and fasteners on metal panels
- Drainage systems
- Protective coatings
- Panel surfaces
Be on the lookout for issues like discoloration, staining, surface pitting, or rust near fasteners and seams. These small problems can quickly turn into major repairs if ignored.
Inspection and Repairs
Start with a ground-level check using binoculars, and focus on these common problems:
| Problem | Signs | Action |
|---|---|---|
| Corrosion | Discoloration, pitting | Clean and apply rust inhibitor |
| Loose Fasteners | Panel movement | Tighten or replace |
| Coating Wear | Peeling, thinning | Apply a new protective coating |
| Panel Damage | Dents, scratches | Paint over to prevent rust |
For rust, use a wire brush to remove oxidation before applying a rust-inhibiting product. A product like Rust Bullet Standard Formula is highly effective. For instance, it helped save over $300,000 in repairs on a 48,000-square-foot metal roof restoration project.
Conditions That Speed Up Damage
Certain environmental factors can worsen metal damage, including:
- Salt air
- Acidic rain
- High humidity
- Built-up debris
- Poor drainage
"Corrosion occurs when metal reacts with moisture, oxygen, and certain chemicals in the air, leading to oxidation." – Green Metal Roofing Inc.
How to Protect Your Roof
Take these steps to keep your metal roof in good shape:
- Clean surfaces regularly to remove debris
- Reapply protective coatings every few years
- Ensure proper drainage to avoid water pooling
- Fix small issues quickly to prevent bigger problems
If you live in a coastal or humid area, consider using aluminum or galvanized steel components for better rust resistance. A little maintenance now can save you from expensive repairs later.
Next, learn how to handle moss growth to reduce moisture retention and protect your roof further. Stay tuned for tips on tackling moss effectively.
8. Stop Moss Growth
Moss can trap moisture and lift shingles, leading to damage and expensive repairs. Taking action now can help you avoid these issues.
Apply Roof Cleaners
The Asphalt Roofing Manufacturers Association (ARMA) suggests using soft washing to remove moss without risking your roof’s warranty. This method uses low-pressure water, making it a safer option than pressure washing.
Here’s a recommended cleaning mixture:
- 50% water
- 50% 10% pool chlorine
- 1 tablespoon dish soap
Steps to follow:
- Preparation: Pre-soak nearby grass and plants with clean water to protect them from the cleaning solution.
- Application: Work in sections from the bottom up. Let the solution sit for 30 minutes, then rinse thoroughly with a garden hose.
| Product | Rating | Coverage | Price |
|---|---|---|---|
| Wet & Forget Outdoor | 4.2/5 (1,186 reviews) | Full roof | $34.99 |
| Roof Shingle Cleaner OX 3000 | 4.75/5 (4 reviews) | 3,000 sq ft | $59.75 |
| BioAdvanced 2-in-1 | 3.8/5 (1,542 reviews) | 32 oz bottle | $19.17 |
"Soft wash systems use a lower pressure pump spray application of cleaning solutions than pressure washers do so they won’t harm or decay your roof! They put out about the same PSI (pressure) of your garden hose and they are the absolute safest way to wash your roof." – Spotless Gutter Cleaning & Repair, Inc.
Once the roof is clean, consider adding prevention strips to keep moss from returning.
Add Prevention Strips
Prevention strips are a smart way to reduce the need for frequent cleanings. Copper strips are especially effective, as they can clean up to 15-20 feet down the roof slope.
Copper vs. Zinc Strips:
| Feature | Copper Strips | Zinc Strips |
|---|---|---|
| Coverage Area | 15-20 feet down slope | About half the reach |
| Durability | Lasts a lifetime | May need replacement |
| Maintenance | Minimal upkeep | Regular upkeep needed |
| Environmental Impact | Natural process | May require chemical treatments |
| Aesthetic Value | Develops patina | Simple appearance |
To maximize their effectiveness, install these strips along the roof’s ridge line so rainwater can flow over them. While copper strips may cost more upfront, their durability and performance make them a better long-term investment.
Lastly, keep trees trimmed and clear debris from your roof to further reduce moss growth.
9. Fix Sagging Spots
A sagging roof needs immediate attention to avoid more expensive repairs later.
Key Warning Signs
-
Visual Inspection: Check your roofline for dips or uneven areas. In the attic, watch for:
- Sagging roof decking
- Water stains on beams or other supports
- Cracked or damaged ceiling panels
- Broken collar ties
-
Common Problem Areas: Sagging often occurs where:
- Snow and ice pile up
- Water collects after rain
- Rafters connect to supporting walls
Repair Costs
Fixing a sagging roof can range from $1,500 for minor issues to as much as $7,000 for severe damage. While waiting for professional help, you can take temporary measures to stabilize the roof.
"If you are worried you have a sagging roof it is crucial to identify the issue and contact a professional to prevent further damage." – Leverage Roofing
Temporary Fixes
- Use joist jacks to provide temporary support in the affected area.
- Reinforce weakened rafters with "L" channel brackets.
- Seal any areas prone to moisture with silicone to limit further damage.
Safety Tip: Avoid walking on sagging sections. Instead, take photos from a safe distance and share them with your roofing contractor.
Long-Term Solutions
Professionals typically fix sagging by:
- Adding extra support beams
- Replacing damaged rafters
- Using gusset plates to strengthen the structure
- Improving waterproofing to prevent future issues
Up next, explore the professional methods used to ensure long-lasting roof stability.
10. Get Professional Help
While some roofing tasks can be tackled on your own, more complex problems require the expertise, tools, and safety measures that only professionals can provide.
Once you’ve handled the simpler DIY tasks, it’s crucial to reach out to experts for any lingering uncertainties or challenging repairs.
Why Choose Professionals?
Hiring roofing experts comes with several benefits:
- Spotting Hidden Issues: Professionals can catch subtle signs of damage that most people might miss, saving you from costly repairs down the line.
- Insurance Assistance: A detailed assessment from a professional makes filing insurance claims smoother by providing clear documentation and repair estimates.
- Warranty Compliance: Routine maintenance by certified pros ensures your roof stays in line with warranty requirements.
When Should You Call an Expert?
| Problem | Why Experts Are Needed |
|---|---|
| Storm Damage | Hidden structural issues may not be obvious |
| Missing Multiple Shingles | Could indicate deeper concerns |
| Leaks in Ceiling or Attic | To stop water damage and mold growth |
| Large Object Impact | To check for unseen structural damage |
| Complex Roofing Systems | Multi-layer roofing requires specialized knowledge |
If you encounter any of these situations, calling in a professional is often the safest and most effective option.
Prime American Roofing Services

For those in Southern California, Prime American Roofing offers a range of dependable services:
- Free Initial Inspection: A complete evaluation of your roof’s condition.
- Expert Repairs: Solutions for everything from minor fixes to major damage.
- Emergency Services: Quick response for urgent roofing needs.
- Preventive Maintenance: Regular check-ups to prolong your roof’s lifespan.
Their team follows strict safety standards and carries full insurance, giving you peace of mind and protecting you from liability.
Conclusion
Regular spring roof maintenance offers clear financial and practical advantages. Industry data shows that roofs receiving consistent care cost 11 cents less per square foot over their lifespan and last an average of eight years longer than those left unattended.
Taking care of your roof also helps avoid expensive repairs and protects your property. Tony Mirzakhanyan, Head of Prime American Roofing, emphasizes the importance of teamwork in achieving excellent results:
"Working in a professional and responsible team is essential for delivering high-quality roofing services. Collaboration ensures that each aspect of the project, from initial assessment to final installation, is executed with precision and expertise".
Here’s how proper maintenance pays off:
| Maintenance Action | Benefit |
|---|---|
| Regular Inspections | Extends roof lifespan (15-75 years) |
| Preventive Repairs | Saves 11¢ per square foot |
| Professional Service | Adds 8 years to roof life |
| Seasonal Care | Lowers emergency repair costs |
These numbers highlight the importance of timely, professional maintenance. Experts recommend scheduling inspections in both spring and fall. Prime American Roofing provides thorough maintenance services, including free initial inspections and expert repairs, to help keep your roof in top shape year-round.